We’ve started rolling out PowerObjects’ PowerPhone. Users love the functionality and it’s lead to more CRM use overall.
We researched a few different CTI solutions. Getting it setup in CRM is a breeze, but when it comes to configuring things on user computers it’s actually harder than I originally thought. It took us about two months and too many hours to figure out. So I’m sharing the necessary steps so you don’t have to feel the same pain.

There are assumptions we have to make before we proceed:
Assumptions
- You are on Cisco’s UCM (Unified Communications Manager) platform 9.0 or above.
- UCM 9 supports Windows 7
- UCM 10 and 10.5 support Windows 8.1
- You have already downloaded the TAPI install files from UCM – (Note: there is no other way I know of to get the install files)
- You have already uploaded the PowerPhone solution in your CRM instance and enabled it – found HERE.
Steps for installing the PowerPhone agent on user computers
- Double click the TAPI installation (be sure to choose the correct version – x86 vs x64). Note: Just “next” the whole way through
- If not installed, install .NET framework 4.5
- A restart may be required at this point
- Download the PowerPhone Agent from HERE
- Open the zip file and copy the entire “PowerPhone_1_3_2_5_agent” directory to the user’s C: drive
- Once copied, open the directory and pin the PowerPhone.exe file to the task bar. This will help the user when logging in to the phone.
- Log in to Unified Communications Manager
- Go to User Management > End User
- Search for the User. Once found open the end user configuration by clicking on their name
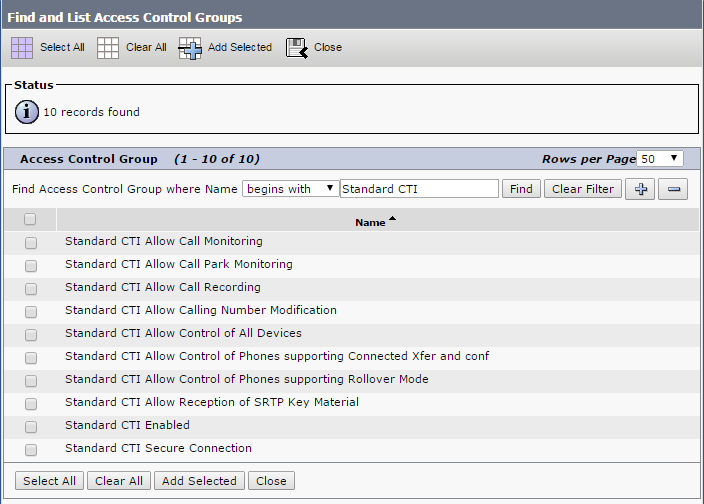
- Scroll to the bottom and click “Add to Access Control Group”

- A pop-up will open, search for “Begins with ‘Standard CTI'”

- Assign the user the “Standard CTI Enabled” role
- Hit Save on the End User Configuration record
- Go to Start > Launch TSP
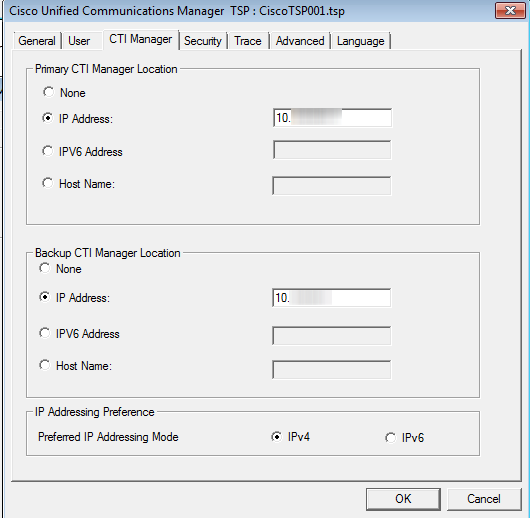
- Right click the TAPI driver in the notification area and choose “Cisco TAPI configuration”
- Once open, make sure the instance is selected and choose “Configure”

- On the User tab, have the user enter their Cisco username and password – if you have LDAP you would enter your AD credentials here

- On the CTI Manager tab, enter the IP address(es) of your Cisco servers

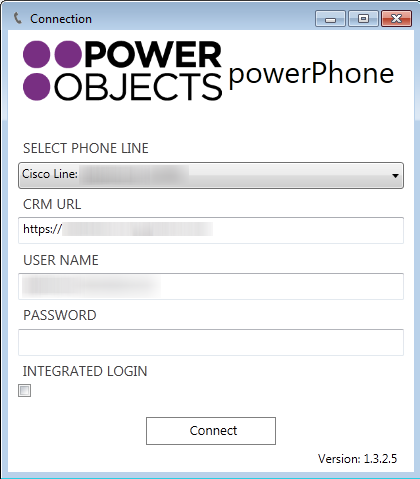
- Make sure the user has PowerPhone rights in CRM before proceeding
- Open PowerPhone and configure the connection:

- Select the phone line and add in the connection info to your CRM instance. If the phone line doesn’t appear in the dropdown then something hasn’t been configured properly with the TAPI driver.
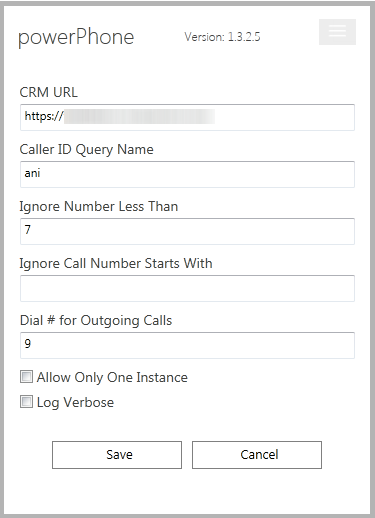
- Once connected, click on settings and set the outgoing number (9 in our case)

- Last step (at least for us) we had to make an outgoing call from PowerPhone so the TAPI driver will make the proper connection to the phone system. YMMV on this.